The following guide is designed to help you configure your Cisco SG300-series network switch for Dante and AES67 networks.
Before You Begin
- Ensure that you have a Cisco SG300-series switch. This article only applies to Cisco SG300-series switches.
- Decide
how IP Addresses will be managed. It is fine to use DHCP (e.g., from a
Crestron server), Static, or Self-Assigned addresses. If you are using
Static IP Addresses, create a spreadsheet to keep track of each device's
address. We have included a sample spreadsheet at the end of this
document. We suggest tracking the device make, model, MAC Address(es),
IP Address(es), firmware version, date purchased, and date installed.
Include your switch in the list.
- Update your switch to the latest firmware available from Cisco.
Configuring a Cisco SG300-series Switch for Shure Dante Devices
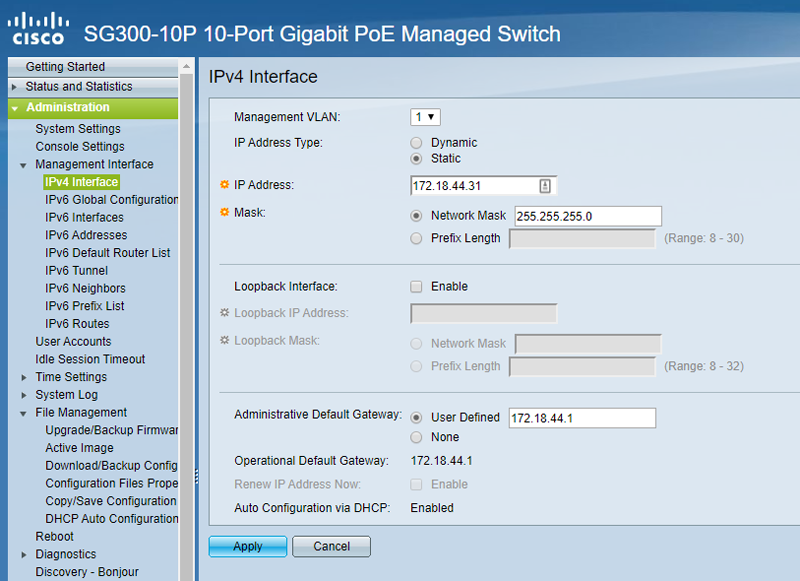
- Under the Administration menu,
select Management Interface > IPv4 Interface. Assign the switch an
IP Address in your Dante subnet, set the correct Subnet Mask (Netmask),
and set the gateway to 0.0.0.0 if this is an isolated network. Apply
changes and reconnect to the switch if needed.
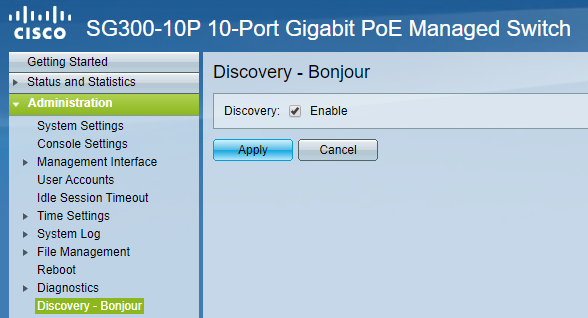
- Under the Administration menu, select Discovery-Bonjour. Ensure Bonjour is enabled.
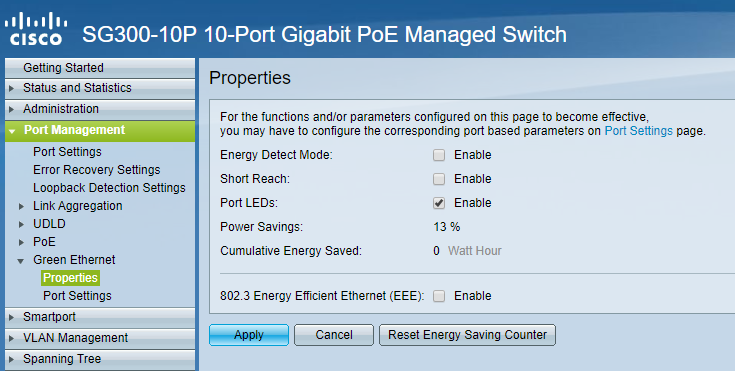
- Under the Port Management menu, select Green Ethernet > Properties. Ensure Energy Detect Mode and 802.3 Energy Efficient Ethernet is disabled.
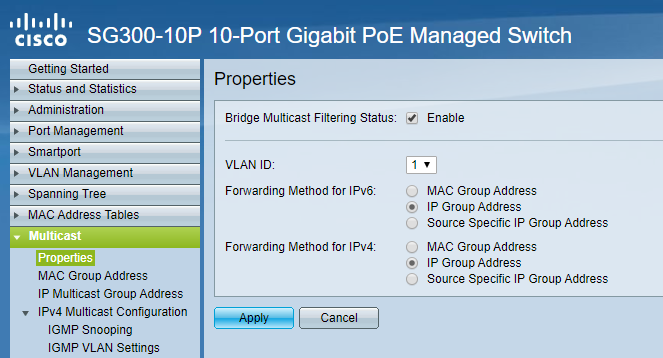
- Under the Multicast menu, select Properties. Enable Bridge Multicast Filtering. For each VLAN, select IP Group Address" as the Forwarding Method.
- Under the Multicast menu, select IPv4 Multicast Configuration > IGMP Snooping menu and enable Snooping.
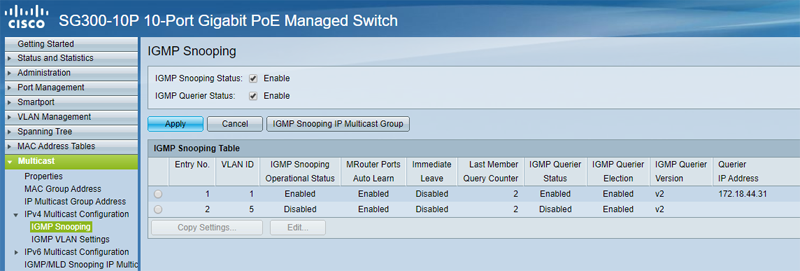
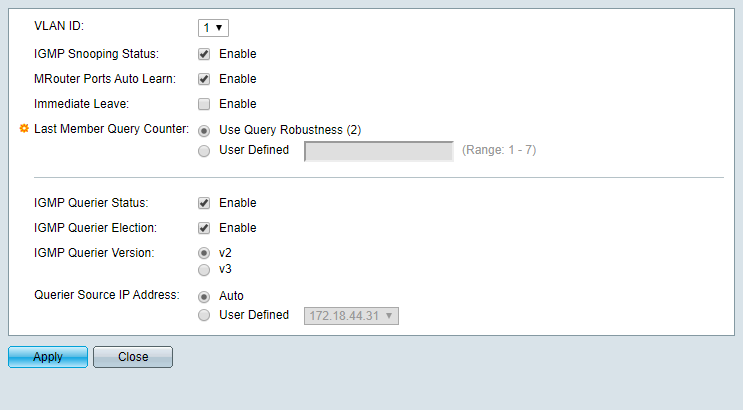
- Edit each VLAN in the IGMP Snooping Menu as follows:
- Enable Snooping Status & Querier Status.
- Set Query Interval to 30 seconds.
- Select IGMPv2 as the Querier version.
- Select Auto for Querier Source IP Address
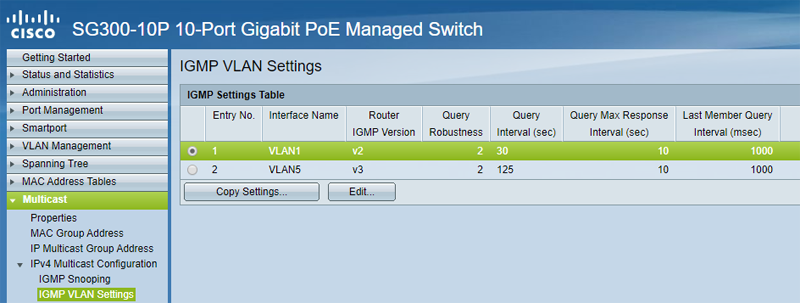
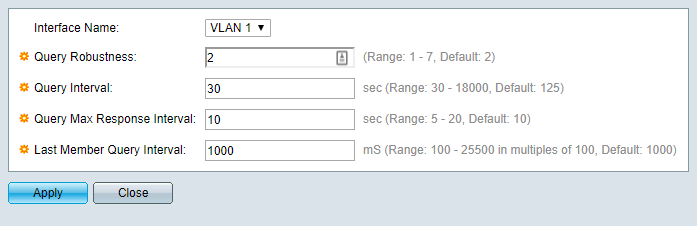
- Under the Multicast menu, select IPv4 Multicast Configuration > IGMP VLAN Settings and configure each VLAN as follows.
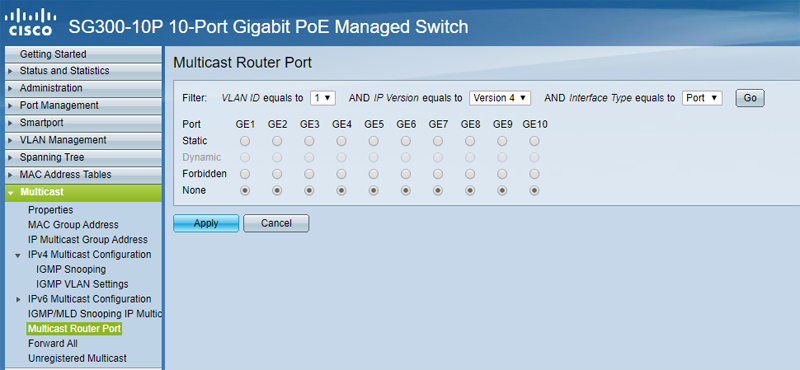
- Under
the Multicast menu, select Multicast Router Port and set all ports to
None. This will cause the switch to Auto-Detect a Multicast Router Port
if needed.
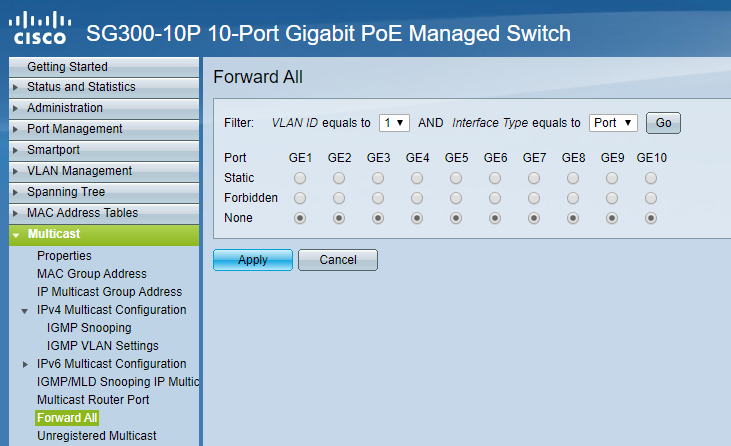
- Under the Multicast menu, select Forward and set all ports to None. This will prevent multicast from Flooding all ports.
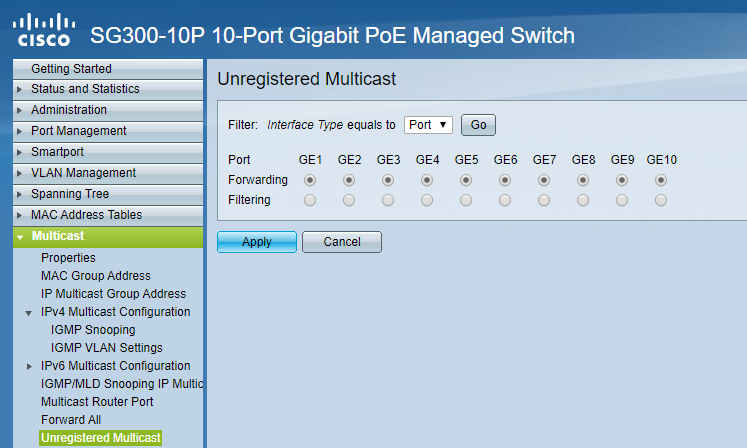
- Under
the Multicast menu, select Unregistered Multicast and set all ports
connected to Shure equipment and your Dante Controller PC to Forward.
Failure to do this may cause Dante Controller and Shure's tools to not
discover any devices.
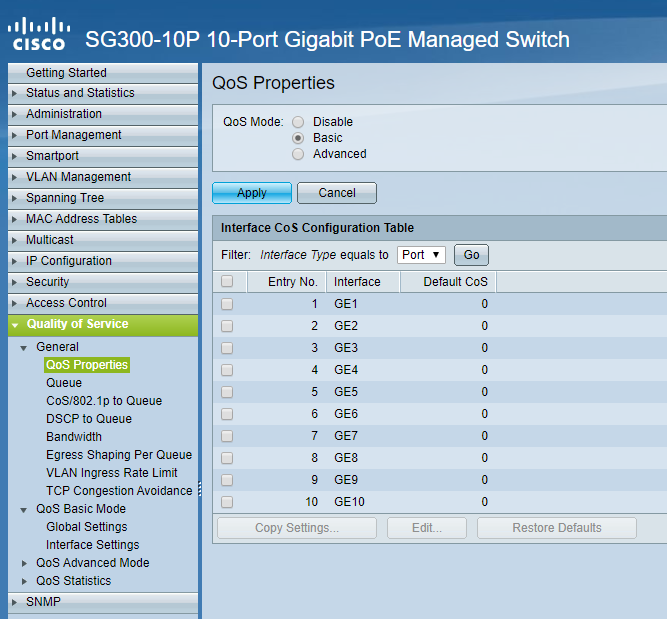
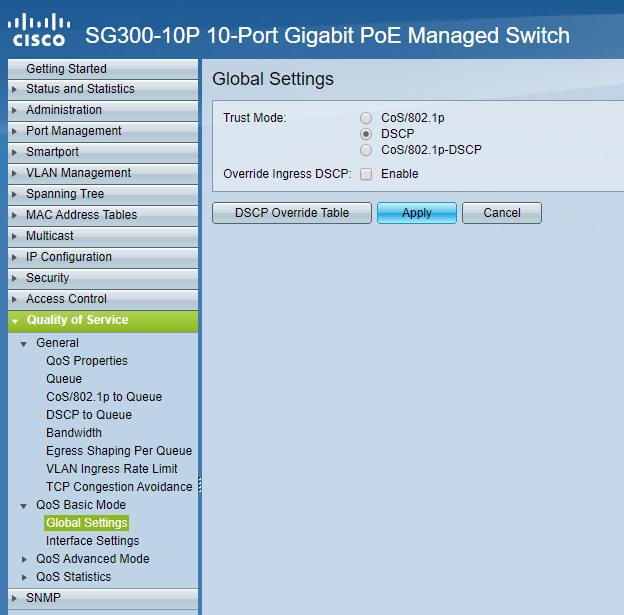
- Under the Quality of Service, menu, select QoS Properties. Set mode to Basic.
- Under the Quality of Service, menu, select QoS Basic Mode > Global Settings. Set Trust Mode to DSCP.
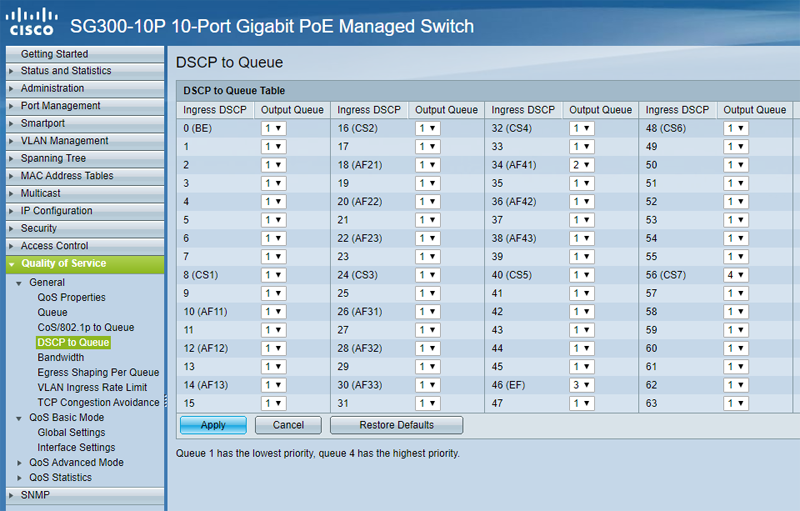
- Under
the Quality of Service, menu, select DSCP to Queue. Set Trust Mode to
DSCP. Configure the table to look like the screenshot below with DSCP 56
set to Queue 4, DSCP46 set to Queue 3, DSCP34 set to Queue 2, and all
other DSCP values set to Queue 1.
- The switch is now configured. Save the settings and create a backup.
Verifying Your Work
- Connect all of your Shure devices to the network switch, and if necessary, assign them a Static IP address.
- Open Dante Controller and ensure all devices appear under the Device Info tab.
- Verify
that only one device is the Master on the Clock Status tab. All other
devices should say Slave. If you are using AES67, we generally recommend
that the same device serve as both the Dante and AES67 master.
- Open
Shure Update Utility, and configure it to use your Ethernet adaptor.
Verify that all devices appear in the list, and are on the latest
firmware.
- Route your audio as desired, and ensure it is working correctly.